
DYI Pull-up Bar
Back in 2009 when I first started P90X, I was using a doorway pull-up bar, not that much different than the P90X Chin-Up Bar. That worked well enough while I was working out in the various rooms in my house. Once I started working out in my garage about a year or so later, I wanted to put a ceiling mounted pull-up bar out there and ditch the door-way option.
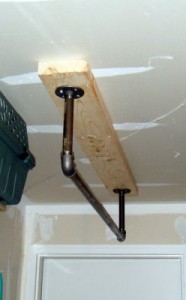
What I ended up with was a pretty basic straight bar option that worked out great! I am a bit of a DIYer and so for me it was pretty simple to put together and install. I used the opportunity to share what I built with a dedicated website, which you can check out here: Make a Pull-Up Bar.
What it lacked
The biggest issue with the straight bar was the lack of ability to change my hand positions other than in and out along the bar with the various pull-up exercises. I wanted to be able to position my hands in the neutral position as well as wide grip at a slight angle downwards like I’ve seen with other pre-fabricated pull-up bar products.
Of course, I could have purchased something, but I was confident that I could some up with something to make this work.
4-Position Pull-Up Bar
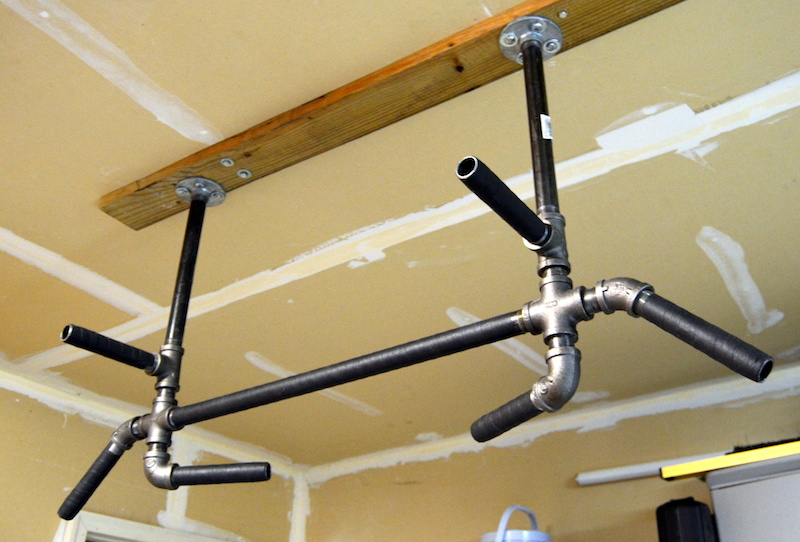
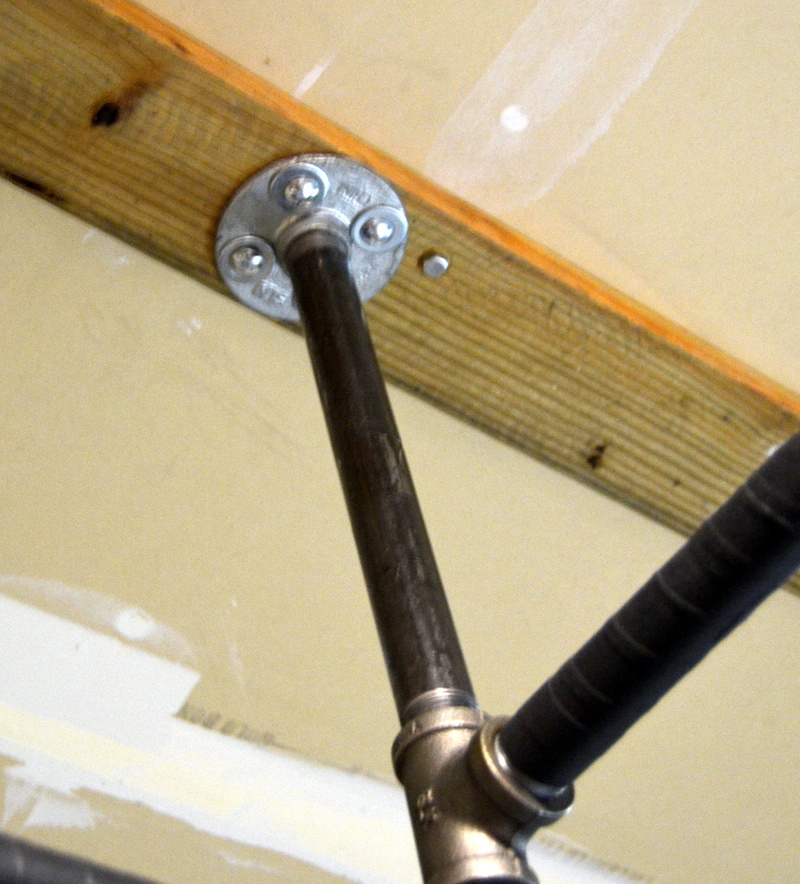
Here is what I came up with and so far…I LOVE IT!

In case you were curious, the 3/4″ black pipe is definitely sturdy enough to hold my 170# frame without issue. You could opt to use 1″ pipe for even more stability, but it may be tough to get your hands around that size of a pipe. The connection to the ceiling is really where the stability of the entire setup comes into play. Once you have the support structure in place, the pull-up bar itself shouldn’t be a problem.
List of Materials
Here is a complete list of materials that you will need to make a pull-up bar just like the image above.
| Qty Needed | ||
|---|---|---|
| 3/4" Floor Flange | 2 | 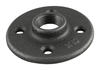 |
| 3/4" x 12" Straight Pipe | 2 | 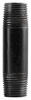 |
| 3/4" Tee | 2 | 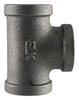 |
| 3/4" x 24" Straight Pipe | 1 | |
| 3/4" x 6" Straight Pipe | 6 | |
| 3/4" Iron Cross | 2 | 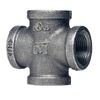 |
| 3/4" 45 Degree Elbow | 2 | 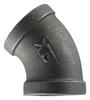 |
| 3/4" 90 Degree Elbow | 2 | 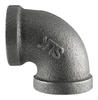 |
| 3/4" x 2" Nipple | 6 | |
| Lag Screws - 3/8" x 5" | 4-6 |  |
| Carriage Bolts - 3/8" x 5" | 8 |  |
| Washers | 16 |  |
| Nuts - 3/8" | 8 |  |
| Racquet head protection tape 1 inch x 25ft, Black | 1 |  |
Installation
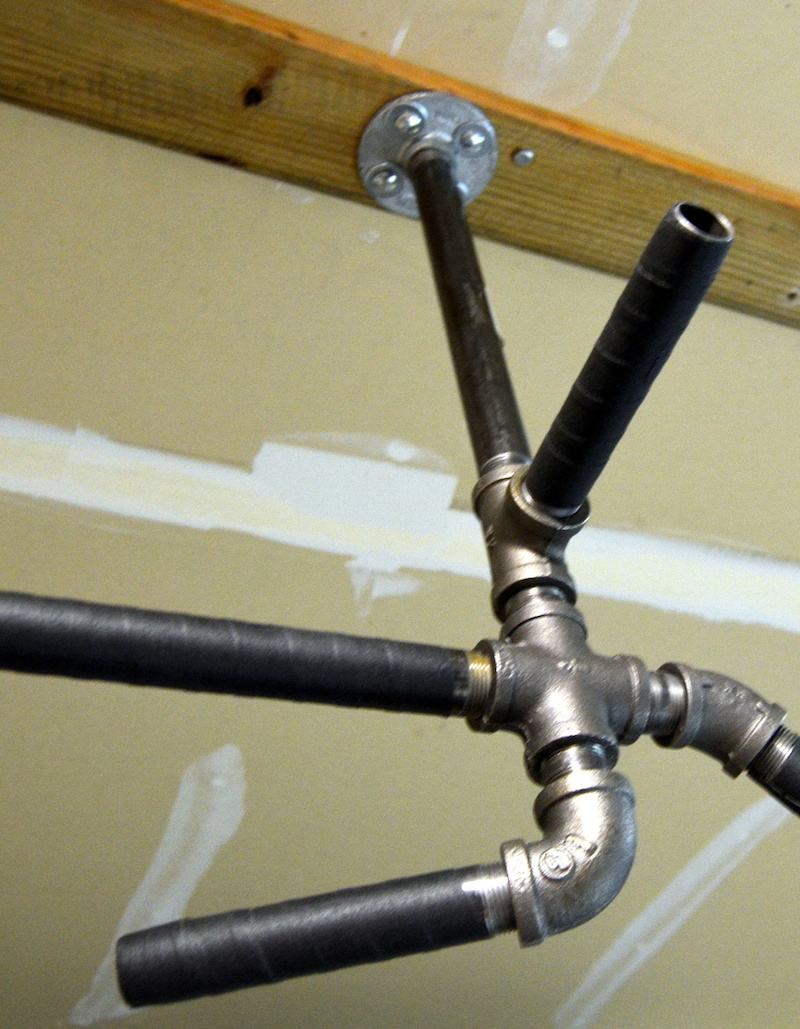
- Construct the pull-up bar as detailed in the photo above – square and tighten all connections.
- Depending on your set-up, the attachment to the ceiling may be different.
- At a high-level, you need to secure the pull-up bar to a 2″x4″ or 2″x6″ that is itself secured to your ceiling rafters/joists using lag screws or carriage bolts.
- I used a combination of carriage bolts to connect the pull-up bar assembly to the support structure and lag bolts to secure the 2″x4″ or 2″x4″ to the ceiling/rafters in order to get the job done.
Initial Feedback
I have used this pull-up bar a couple of times since I have had it installed, once for a P90x3 routine called, The Challenge. This is as simple as it gets, pull-ups and push-ups for 30 minutes. You can check out my review of that routine and see this pull-up bar in action here -> P90X3 – The Challenge – Review
This DIY pull-up bar worked out perfectly for this particular routine. The additional grips available allowed me to work my back muscles at slightly different angles for a more complete workout. There were no issues with it holding me up and at no time did I feel insecure while using the pull-up bar. The added tennis racket tape (added after the video review) also was a nice feature, giving me a little bit more drip and comfort.
Summary
If you feel like you can tackle this DIY project, I would highly recommend you give it a try. Putting the bar together, it pretty straight-forward and actually a little fun! The installation can be a little bit tricky depending on your setup and may require a second set of hands on occasion, so keep that in mind. Let me know if you decide to put this 4-position pull-up bar together and how it works out for you!
Thanks guys!
Need a Coach?
If you need to find someone that will hold you accountable, answer your questions, help you, and PUSH YOU for the entire duration of your workout! Luckily for you, that’s what me and my team are here for. If you don’t have a coach yet and want one, I’d love to be your coach and help you through a fitness program. I am available to help you reach your goals!

Email Me: coachchris@yourfitnesspath.com
Connect on Facebook: fb.com/coachcoburn
YouTube: https://youtu.be/coachchriscoburn
Instagram: @chris_coburn
Twitter: @yourfitnesspath

Hi. How long have you been using it? Is that safe?
Comprasffernandes – I’ve had this version of my pull-up bar in for about 4 months – no problems. Previously I just had a straight bar and that was in place for about 2 years before I made the updates. As long as you have it properly secured to the joists/rafters, you should be fine. The steel pipes are tough enough to hold my 170+ lbs frame. If that is a concern, you could go with the 1 inch pipes and have no worries.
HTH man!
Do the bottom two bars (with 90 deg elbows facing at a 45 inward) get in your way when using the straight bar? Did you leave them a little loose to swing them back and forth? How is it working out?
No, the angled bars don’t get in the way. The nice thing is depending on where you install the bar, you can use it from both sides. I tightened them down pretty good, so that don’t move without a lot of effort.
How do you use the bars pointing 90 degrees forward? What exercise uses this?
Why did you use 5 inch carriage bolts? Looks like 3 inch would work better.
What you can’t see in any of the photos is the support 2×4 in the attic space that the carriage bolts must also go through. The 2×4 is positioned between the rafters of the attic, which run perpendicular to the pull-up bar. Make sense?
coachchris Comprasffernandes I weigh roughly between 230 to 240 lbs at any given time should I step it up to 1″ and maybe anchor it more?
TimothyMallet coachchris Comprasffernandes – I don’t think that the actual bar is going to give you any issues, but if you would feel more secure with the 1″ bar – go for it!
The securing of the bar to the ceiling is going to be where you’ll want to ensure everything is sound. Depending on what is behind it that you would be attaching it to, that is likely where you will need something extra.
this is great … thanks for the idea.
How did you fit the 3/8″ lag screws/carriage bolts through the 3/4″ flange?
It seems that the bolt holes on the flange are too small to take the 3/8″ lag screws/carriage bolts. I found that quarter inch lag screws/carriage bolts do indeed fit through the 3/4″ flange. Would quarter inch lag screws/carriage bolts be able to support a person’s weight?(I weigh around 165 lbs)
Thanks
1/4” lag screws 4.5” long
I just bought the materials for this..but I don’t understand how you got the 3/8″ bolts to fit into the mounting holes on the floor flange. They aren’t big enough. Can you let me know?
Thanks,
Matt
vikramt1998 what did you end up doing to fix this problem? I’m having the same problem.
Thank you, it was really helpful 🙂
Pingback: Garage Gym DIY Workout Equipment Ideas You Need To Try - Garage Gym
[…] (Source) […]
How much was the hardware? Round about?
I believe I paid about $40-45. I already had the 2×4 lumber.
guitarfez I believe I paid somewhere between $40-45 on the hardware. I already had the 2×4 lumber.
Thanks for the update. This is a great point to make for those of us watching every penny, yet want a diy project. We won’t be able to blame the equipment inner built it…
guitarfez – You bet! If you put one of these up – let me know how it turns out.
How did you lock the various elbow joints in place to prevent them from moving?
JamesCygnus – A couple pair of adjustable pliers is your best option here. I’ve never had any of the joints move when using since installation.
coachchris Thanks! 2 more questions: Where did you find the 3/4″ Iron Cross/Tee? Lowe’s and Home Depot only seem to carry 1″ versions. When attaching the floor flange to the 2×4, what did you do with the “extra” length of bolt that pass through the wood? Do they “punch” up into the ceiling drywall?
JamesCygnus – I was only able to find that at Lowe’s, I had to go to a couple of different stores. Check the online site, might help.
The bolts actually go up through the ceiling into another 2×4 on the other side of the drywall that is anchored to the ceiling rafter/joist.
coachchris No luck at Lowe’s. They have to special order it. Going to try a local plumbing supply store next.
Is your ceiling 8′? My garage ceiling is 10′ – debating how to make that work. I’d need to use a 36″ drop down instead of the 12″ in your design. Worried that might make it unstable…
JamesCygnus coachchris
PhilRingsmuth JamesCygnus coachchris – ouch! I think when I purchased them, they were around $5!
Just trying to figure out the ceiling mount with the hardware you recommended. So you used the lag screws to screw the 2×4 into the joist and the carriage bolts to pass through the 2 x 4, through ceiling, through an additional 2 x 4 that was screwed in between joists? Thanks in advance!
CristJian did you just spray paint yours? Any special type of paint? Looks cool.
I’ve never built anything with this type of pipe. Is there any play with the exact location of the handles? Are you able to move them easily for additional variations or do you lock them in place?
GabeDarnell – I am actually using some grip tape. Check it out here: http://amzn.to/2gfZV7y
GabeDarnell – There shouldn’t be a lot of play in any of the connections once you have it in place. I didn’t move the handles around once I had setup, but I suppose you could try – not sure what other positions you were thinking for the handles?
Thanks for the post. I’m interested in how you secured it to the 2×4 with carriage bolts? How did you get to the other side with the nut, with it being against the ceiling? Could you use lag screws instead to put the pull up bar into the 2×4? Thanks for the help. Nice work!
VTWill – Above my ceiling is attic space – I was able to attach some cross-members to the rafters, to which I secured the carriage bolts. If this isn’t an option for you – lag screws would likely be your only option. Though, being able to get all 4 lag screws into something solid may be tricky.
Let me know if that helps!
Curious – on the other pullup bar, your long bar is 48″; this one shows only 24″ – that seems like it would put the outer ones too close for a wide grip. Or does it work out ok. Perhaps needs to be adjusted based on person’s height and arm length??
carlaxelfranzon – I use the extension pieces on the end of the bar (they angle downwards in the photo). The width is pretty good.
coachchris Thanks. Headed to Lowe’s later this week.
It does not give any installation instructions. Do the carriage bolts go through drywall as well and are tightened from the attic? Looks like a pretty cool bar, I am going to build one this weekend.
The installation can vary from person to person due to access to attic space above garage or ceiling it is being installed onto.
I will update the post with some additional details that may help you out here.
Just picked up the majority of the pieces of the puzzle as the iron cross was not available at my local Homedepot or Lowes. Once I get it Monday I will see if I can post some pics.
For attaching the rig to a 2×4, I got 3/8″ x 3″ lag bolt and will be using nuts to attach to a 2×4 through the flanges.
I also got wood screws 1/4″ x 5″ to attach the the 2×4 to the ceiling joists in my basement.
Since I have a low ceiling, the 12″ straight pipes on the sides makes the bottom too low to perform any pull ups without bending my legs, so I will get either 6″ or 8″ for the sides.
EDIT: In Canada, so far the material is coming up to over $60, but thats because I had to buy screws, nuts, and bolts as well.
Your bar looks great! It doesn’t look like you used any washers. I was thinking the washers weren’t necessary too. Is it holding up pretty well so far? Why did you opt to use lag screws to attach the bar instead of carriage and wood screws to attach the 2×4 instead of lags? Trying to decide what’s best for me.
Use washers if you can. I forgot them. Might remove and put them in.
I’d recommend the washers on the side not shown here – this will ensure that the carriage bolt screws aren’t pulled through. Make sense?
I already have washers on the nut side. I don’t have them on the flange side.
Should be okay without them honestly…
Looks great Andy – well done!
Thanks for the tips, guys. I used washers. 🙂
Thank so much for the design, Chris! I was a little confused about which screws/bolts/washers to use at first but I figured it out and am soooooo happy! No store near me had iron crosses. So I ended up losing the lowest part. It worked out fine since the basement ceiling is low anyway. I’m so happy to finally have a pull up bar. Thanks again for a great design! https://uploads.disquscdn.com/images/c3782f1f3d61bc416f232a0f45abe23884d73b8b85cc332b98dfabb548e7943d.jpg
Looks awesome – the multi-colored tape is money! Great work!
It really wasn’t intentional. The store near me only had trios of neon colors. It worked out though, because it matches my resistance bands. https://uploads.disquscdn.com/images/d9cd10f8b8efdeac03eee1998b77cd2a7c5a1f859f4d5b72758a5dc45d647c96.jpg
Thanks for sharing your detailed idea! And quick Q.: how long (wide) do you recommend the main bar to be? 4 feet?
If you are planning to use the outside (angled) handles, 4 feet will be way to wide…In the list of material above, I used a 24 inch wide straight pipe.
Otherwise, you can go wider if needed.
I’m thinking of adding a some dip handles to this. I figure if I change the lower elbow to a T, I could come down about 3′ ish ( still need to measure) then add another T with one extension going about 18″ or so to brace against a the wall, maybe even bold it there with masonry screws, and the other facing me with a 6″ pipe. Do you this would work?
Hey – great idea! It may work, I’d be concerned with stability, but anchoring it to the wall should be do the trick. Share a photo of your finished project – I’d love to see the new feature.
Pingback: DIY Fitness Equipment: How to Make Your Own Gym With Almost No $
[…] via Your Fitness Path […]
Hello Chris (and other men who can offer some help for designs for a tall dude)!
I am transforming my garage into the beginnings of a Crossfit gym as a move-in/birthday gift for my boyfriend. Here’s my question…He’s 6’2″, 205 lb, with pretty broad shoulders. I am wondering if I should alter this design a bit for width. When he’d thought of building his own last year, he seemed to want a 48″ bar because he thought that was what they had at the crossfit gym and he wanted to be able to spread his arms out. But that was for a standard pull up bar. I see that the wider grip you’ve added to the outside is designed to meet this need, but I am not sure what man-size range it might cover. I don’t want him to feel cramped. Based on your (and your readers’) experience in workouts and with various equipment, can you offer any thoughts on this before I get started? I am assuming those straight pipes only come in 12″ intervals?
Any similar thoughts from guys with large hands on the 1″ vs 3/4″ bar width?
Also, maybe I missed it somewhere, but what was your final cost to build this?
Thanks for the great design!!
Sorry for the delay in replying here…
As depicted above, the width is roughly 41 inches. It may be tough to find bars of varying widths in stock at your local home center store, but possibly through a plumbing supply company…?
As far as the size of the bar itself, I’d probably go with the large size if possible. Having used it for a while now, the 3/4″ pipe is smaller than what you would find in something in a crossfit gym (Rogue), which is typically 1.5 inches. But finding the “iron cross” would be tricky in that size. You could do something like @daizygirl:disqus did and not use that iron cross piece an get by.
Total cost to build this bar was roughly $50, I believe some of my supplies were on sale at the time.
HTH.
Hi chris! Thanks for the response. I did go with the 1″ bar when I bought supplies yesterday–good idea. I ended up with a 36″ center straight, but now I think it will be too long. Do you mind telling me how tall you are? Is the 41″ total build span very comfy for you, or should I go wider? I can always have the store cut and re-thread the center bar to something in between, like 30″. I wish I could just ask the man but I want it to be a surprise. 🙂
Turns out the real challenge of this project is the shoddy and mysterious construction of my condo complex ceilings… haha.
Robin
The 41″ works fine with my 5’10” – 175 lb frame. I also have a Rogue rack with a 43″ cross member which I also use for pull-ups and I rarely use the entire width of that bar.
Let me know how it turns out. I am sure he is going to love it!
I purchased all of the 3/4 size hardware needed at Lowes except for the 3/4 cross fitting. Went with all black iron hardware. The cost from Lowes was $100.40 and then Walmart online had the same brand (Mueller approved by Grainger) for the cross fittings @ 12.94 with S&H. That’s a total of 113.34. Granted there may be deals out there that I missed, but that’s a pricey bar. I still like the rustic look and the versatility. Not going with any tape so I saved cost there, hah ; )
Hey Jonathan – I just happened to find one of the receipts for this build. I do recall the cross being one of more expensive pieces and only my local Lowes had them. Looking at my receipt, which included everything except the crosses and grip tape, it came out to roughly $40. I purchased everything at Menards during one of their sales, which probably helped quite a bit.
I think the total for everything was somewhere between $60-70?
Pingback: 25 Best Gym Equipment Projects to DIY At Home – DIY & Crafts
[…] Instructions: yourfitnesspath […]
Can it be installed on wall without wood.???
You can certainly try, but I think you have a hard time finding proper anchoring. The spacing between the supports aren’t going to necessarily line up with the studs in your walls. I’d hate for you to get injured or cause damage to your walls if it came crashing down.
What a well written article and the instructions with pictures was super convenient to print out and take with me to the hardware store (as its hard to stay focused standing at the shelves sometimes). Thanks for this. I was super annoyed at the thoughts of having to pay $200 for a ceiling mount bar. Just set mine up!
You bet! Send over some photos of your setup.
You mentioned you had 10’ ceilings in the garage. How far down does this bar extend. I also have 10’ ceilings, and am concerned there might be too much clearance. Thanks.
The two 12-inch pieces of straight-pipe are what attaches to the flanges mounted to the 2×4. When you add in the “tee” and “iron cross”, that will add a few more inches as well. Overall, it’s about 18 inches from the ceiling itself. I have found that it’s better to have more clearance than not enough which require you to bend your legs at the knees while using the bar. HTH
Are you able to do a muscle up with this design? Or what do you recommend in changing up to make sure there’s enough clearance above the bar and enough clearance at the bar to allow your body to drag along it?
Thank you so much!
You could add a longer piece of Straight Pipe from the flanges, though you may lose some stability in doing so.